Inspired by food

Helloooo everyone! Long time no talk. We have a bunch to catch up on but today I want to talk about food.

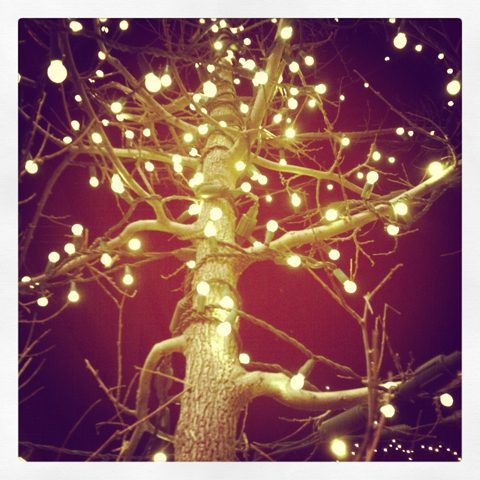
So last week my friend Jem and I met up in Minneapolis to attend a food photography workshop by Lindsay from Pinch of Yum. I’d been following Lindsay for a while and I secretly wanted to attend one of her workshops but I never had the time. This time though, Jem and I jumped on an opportunity to go as “buddies” where we shared a table and set up. We were both pretty nervous since we are trained scientists/science communicators and not professional food bloggers (yet…). But it turned out to be so much fun. Now I am feeling inspired to work on my photography skills again, which is awesome because that’s why I made this blog all those years ago.

Come on, Potassium, enough chatter. Let’s talk about food:

First up: All the food was real. We ate almost everything after we photographed it and it was all delicious. Yum.

Now onto learning how to photograph food! So in addition to Jem and me, there were 11 other women at the workshop. Lindsay organized the workshop into 4 sessions over two days. The first session was a quick how-to lesson for DSLRs and then we got to practice shooting fresh fruits and veggies. Yum. Jem and I chose some radishes and I quickly became obsessed with their tangly roots.

This one made it to Twitter and Instagram but I like it so I’m posting it here too. So red…

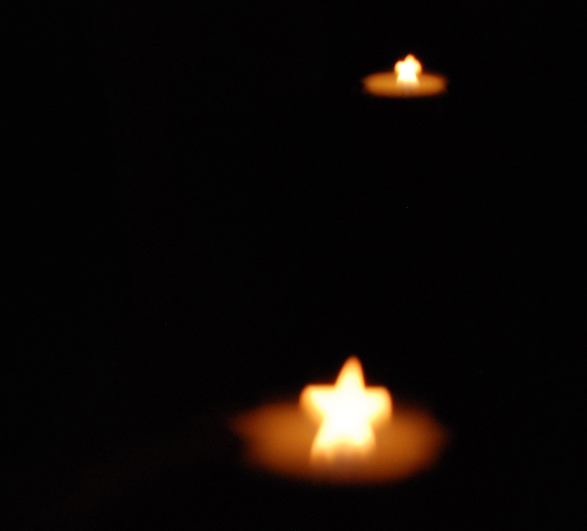
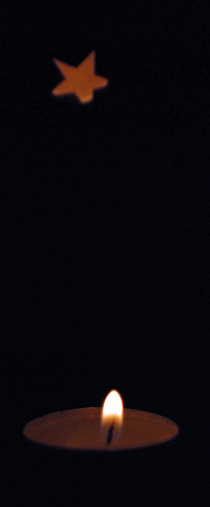
In the second session, we learned about lighting. I think this session was super helpful for me because I never really think about lighting and camera angles when I’m shooting, other than “OK. The sun making weird shadows on my subject. I should maybe move.” Or “Crap, I’m photographing people in a lab and there’s absolutely no natural lighting going on here…. uhhh…” After this session, we practiced with tasty cobbler and melty ice cream. Then after our practice, we got to eat our creations. :D

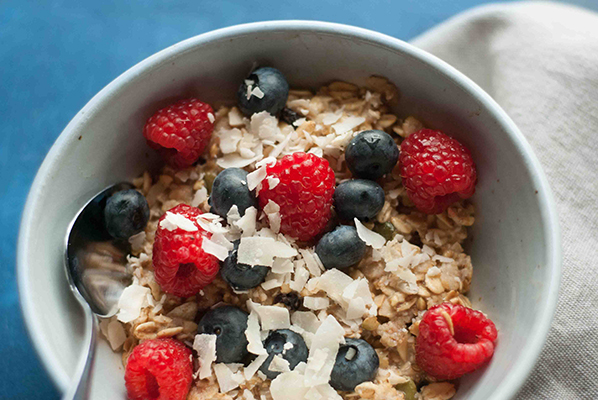
The next day, we practiced our lighting skills again with some tasty breakfast (which also subsequently got eaten). My breakfast is featured at the top of this post.

After breakfast, we started our next session: composition. I loved this session because I think I learned something about myself here: There is no one “perfect” way to compose a photograph. It’s an entirely creative process. You pick what works best for your personal style and the message you want to send or story you want to tell. It may seem simple and/or kind of duh but it was magic for me. I feel like I get frustrated with photography and other creative endeavors (writing, etc.) because my stuff doesn’t match whatever weird standard I think it should match. But now I think that it doesn’t have to. The only thing that matters is that it looks the way I want it to and that it matches me, my personality, and my message (which is usually one of making things accessible in case you haven’t figured that out). MIND. BLOWN.

Anyway, as I was processing that new information, we got to practice our composition with pancakes and a billion possible toppings. Jem and I were really interested in getting motion into our pictures: showing syrup running down the side of the stack or toasted coconut flakes snowing down from above. It was definitely more challenging than we thought it would be but that’s okay. There’s plenty of time to practice. :)

Go syrup, go! Some of you may have seen this on Facebook or Instagram but it wanted to make an appearance on the blog as well.

The final session was to introduce us to Adobe Lightroom, which is one of the Adobe products I hadn’t played with yet. Omg. It is endlessly fun. It’s a different way of thinking about photos compared to Photoshop and it seems equally as powerful as Photoshop (but in different ways). Time for tons of photo playing.

So besides my mind-blowing revelation in the workshop, there were a few other things that stuck out to me that I’d like to mention here. At the beginning, Lindsay asked each of us to write down a few objectives for what we wanted to get out of the workshop. Then she checked in with us periodically to make sure we were hitting our objectives. This activity ensured that everyone had a personalized experience. Also, each session was taught with a small lecture, a demo, and then practice time so that everyone could have a chance to learn however she learned best. Finally, there were so many props for food staging and toppings to try. It was a great safe haven to let your creativity fly! I came home loving my DSLR again and ready to try to take more food pictures on my own.

Below is my first attempt: a matcha green tea latte in a mug that we got for our wedding (they were a set: this one is the Potassium mug and then we also have a blue Cobalt mug <3). I’ve been obsessed with learning how to make my own matcha lattes for the past few months and then this one was so pretty in the Potassium mug. I wanted to show it off. Enjoy!

Mmmm… matcha…

Whew. That concludes Potassium’s epic food photography workshop recap. Stay tuned. More photos coming your way soon (potentially even more food photos).

Now it’s your turn: what is something you have done recently that made you feel inspired and excited? Or what is something you’d like to do? Also it’s summer! Is it hot where you are? We’ve been melting in 100 degree weather up here in… Washington (state)? Yeah… we have a lot to catch up on, don’t we? Until next time!

One Slimer Cake Coming Up!


So my friend J wrote a blog post last week about this crazy vegan avocado chocolate cake that she made. I was intrigued because 1) what would a cake made with avocados instead of eggs taste like? and 2) it has freakin’ green avocado buttercream frosting to go with it. So I got the recipe and Cobalt and I set about making the cake. It turned out pretty good actually. It doesn’t really taste like avocados – mostly like chocolate and bananas strangely actually… Also, if you don’t like the idea of slime-green frosting, you can add cocoa powder to your frosting. I think it’s kind of neat green though. Might make for a fun cooking activity for kiddos…

Anyway, upon frosting our cake yesterday afternoon, Cobalt and I decided that it reminded us of Slimer from Cobalt’s favorite movie ever, Ghostbusters. Thus, Cobalt decorated our cake in proper Slimer fashion! Shown above – our claw machine Slimer gazes in awe at himself in cake-form. Below – slimer cake eaten… Yummmm…

In other news, I’ve been in kind of a photography funk lately. I tried to challenge myself this weekend – taking some self portraits of my new octopus earrings (Now I have black ones and I got some yellow ones as a gift too!) and taking some pictures of the ice we acquired from rain/snow on Saturday and I was frustrated with both activities. Booo… I just got some new photography books from the library… I’m hoping they’ll inspire me…

You know what time it is now… Your turn to comment on my post. How do you feel about avocado chocolate cake? Yay? Nay? Curious about that ridiculously green frosting? It’s REALLY sweet. I’ll tell you that… How about hobbies? What do you do when you’re feeling frustrated with your hobbies? Any advice?

Look at this cat


Yesterday I was going through my recent pictures when I came across all these adorable pictures I took of my family’s cat when Cobalt and I were in California for the holidays. This one is by far my favorite of the 50 or so I took of her… She just looks so regal. I had originally wanted to photograph her because she’s all fluffed up for winter and she looks adorable. I think you can see some of her puffiness in this pic.
In case you are unconvinced about how soft and cute this cat is or if up close cat pictures scare you, here’s another picture of her being similarly adorable/puffy/soft:

Thoughts? I love being a crazy photographer with the cats when I’m home because 1) they are interesting subjects to photograph and 2) then I can look at them when I’m feeling homesick throughout the year (this happens a lot). One day Cobalt and I are going to get ourselves a cute kitty but until then, I guess we’ll be okay with our stuffed shark friends… :-/

Cobalt, Potassium, and Finn, Christmas 2012… This was shot using my infrared remote for my DSLR… You can even see it in this picture. Look how tiny… Don’t you want one for your DSLR?

Do you have pets? Tell me about them! Show me pictures! I love animals. When I was a kid, I wanted to be a vet or a marine biologist (not sure how I ended up in grad school studying biochemistry now, looking back…). Even though I grew up with pet cats, I worked at a vet in high school and had college roommates (one of them is the reason why I met Cobalt) with multiple pet reptiles (a story for another day). These events have not only continued my love of pretty much all pets (cats, dogs, snakes, hamsters, bunnies, etc) but also taught me how to take care of them. Cobalt, you better watch out or you might come home one day to a house full of creatures! ;)

Fun with Air Swimmers!


Whew! Back from vacation! Cobalt and I had an epic time visiting both our families and having double Christmases (note: double Christmas was really awesome – it was great to see both of our families and share Christmas traditions with both of them – minus all the traveling involved to make it happen)! We also had a little party at our house in Colorado for New Years. It was so good to see some of our friends that we don’t usually see for that too. Yay holidays!

Anyway, Cobalt and I brought an Air Swimmer shark for our niece and nephew when we went to visit his family. We had a lot of fun setting it up for them, especially as the Air Swimmer shark also turned out to be HUGE, probably about the size of our niece. In fact, she had trouble holding onto him by herself. Also, the instructions warned us that the Air Swimmer had not been tested to fly above 4000 ft above sea level and we were higher than 7000 feet! But in the end, we got him properly set up and he actually flew pretty well. The kids and I took him down to the basement of Cobalt’s mom’s house so we could play with him. Here are some pictures from the fun!

A and Finn watching Cobalt blow up the Air Swimmer…

A and the Air Swimmer downstairs…

C and the Air Swimmer. He was really great at maneuvering the Air Swimmer. We decided that all those video games make for good practice for making Air Swimmers swim!

The kids stole my camera when I was playing with the Air Swimmer so there’s me!

We loved this… When you are done playing with the Air Swimmer, you can dock him to the remote control so he doesn’t fly away (by the way, in the FAQ on the Air Swimmers website, it says to not play with your Air Swimmer outside because it will fly away and you will be sad… we liked that part too!).

Anyway, this guy was REALLY fun to play with! I highly recommend getting one for you or for a kid in your life. :):)

How were the holidays for you? Any awesome presents? Talk to me! I’ve missed you guys!

Stars!


Today’s fun with lights post involves stars! So now basically, I turned all my out of focus light into star shapes (instead of those pointy starbursts from Tuesday’s post). This is also done by messing with the aperture on a prime (non zoom) lens. Basically, I cut out a star shape on cardstock and taped it in front of my lens. Then I used a really wide aperture (refer to this lovely picture from Wikipedia if you need to refresh your memory from Tuesday – the top is a wide aperture and the bottom is a narrow aperture) to take all these pictures. This wide aperture + the star in front means that all of the out of focus light turned into the shape of stars instead of circles.

Anyway, below are some other fun examples of stars. The top is my Christmas lights again.

So I’m not sure how many of you know that I play trombone but I do (I used to play it a lot more in high school and college… boo grad school eating up all my time)! Here is my trombone covered in stars:

Fun with tealights and mirrors, part 1:

Fun with tealights and mirrors, part 2:

Yay! Shapes! What shape should I try next? My friend Jem has done this with music notes! Super cool idea! Do you guys have any fun plans for this weekend? This is my last full week in lab before Cobalt and I escape for the holidays so I will probably be working… :p

Fun with Christmas Lights!


I’ve decided that today’s and Thursday’s posts will be full of fun with lights! Today we focus on Christmas lights! I bought some purple Christmas lights (though they look red in these pictures…) this weekend and put them up around mine and Cobalt’s office. So immediately, the camera came out and I had to play with various settings. Today we are exploring starbursts! I briefly talked about them last week in my post about A but here’s how it works. If you have a prime lens (so it doesn’t zoom) and you set your aperture really narrow (= a small hole in the lens), any out of focus light will be the shape of the petals of the aperture (Click here for a picture of a large (top) and small (bottom) aperture from Wikipedia). So the smaller the aperture, the more starbursty the out of focus light becomes. It’s kind of fun to play with…

Anyway, here are a few more pictures of me playing with my Christmas lights…

Those of you who are my friends on Facebook have probably seen this one by now (It’s a self portrait taken with my awwwwesome remote control for my camera… TOTALLY worth the extra cash btw for those of you who are thinking of purchasing DSLRs… makes family pictures during the holidays SUPER fun/easy):

More starbursts:

Getting these Christmas lights was actually one of the highlights of my weekend. Life has been fairly ridiculous for us lately so anything that I can do to make our office/house more relaxing/comforting/etc is a huuuuge plus.

Tell me how you feel about Christmas lights! Do you like them? Hate them? How much is too much? I’ve seen a lot of people wrapping Christmas lights around just the tree trunks in their front yards this year… I’ve gotta tell you that I’m not so sure I’m a fan. It looks like a lit up post in the middle of a dark yard… :-/

Speaking of Christmas lights, here is my favorite picture I took with Instagram in downtown Denver this weekend:

DSLRs and what I know about them

Gustav wants to learn how to use a DSLR too…

First off… Our wedding pictures are up! I’ll post some on here on Wednesday! Cobalt and I have to figure out which 50 we like the best out of all of them for our wedding book. So many pictures to choose from!

Anyway, today’s post is about DSLR cameras. I have had a few people ask me if I have any advice on picking out DSLRS/getting into photography. So I thought I’d write a little post about it. Obviously if you have more questions, go ahead and ask and we can continue the discussion over a series of posts.

The bottom line
I think when you get your first DSLR, it’s good to just go with whatever used one that fits properly in your price range. You don’t know what you want in a DSLR yet but you need something to practice on. So if you can find a used (but not too used obviously) one that fits well in your price range, I say just go for it! As you play, you will notice features you do and don’t like in a camera and then when you are a more experienced photographer who can afford a brand new DSLR, you can get a really nice one with all the features you like.

Canon vs Nikon
As for the different brands, I have a Nikon because of just what I said above – my old boss’ husband was selling his old Nikon so he could buy a new one and I really wanted to try it out so I bought it. I haven’t looked back since. It has been so fun. The biggest differences I’ve seen between Nikon and Canon at least is that Canon products (the camera body, the lenses, etc) are usually bit cheaper (though experienced photographers will tell you that Nikon has better picture quality… I have no idea if this is true… I’ve seen professional photographers with both Canon and Nikon cameras). I like the Nikon cameras because you can change all the settings while looking through the view finder (as you’re taking a picture). As far as I can tell, Canon uses a series of menus that require you to use the viewing screen to change settings, but you’d have to ask a Canon person about that. It’s funny how hard it is to switch back and forth between them…

Learning how to use your DSLR
I actually took a class but it wasn’t as hands on as I would have liked. I learned a lot about photography in general – like lighting and composition, etc. It also got me started learning about how to use Photoshop to play with my pictures. A lot of camera stores offer more hands on classes that you can take. They generally have classes dedicated to either brand and any skill level. I learn the best by just trying things out so for me, the most helpful thing was to go out on photography adventures with friends and their DSLRS. We had a range of photography skills and were able to teach each other little things as we played. Some camera stores put on events like Mike’s Camera did with the zoo day where you can play with all sorts of cameras and they are there to help you. I would definitely recommend looking into what cameras stores you have around you. They usually have a list of fun photography events or classes in the community.

I think that’s all I can think of for now! Do you have any questions? Let’s hear them! I hope this was helpful…